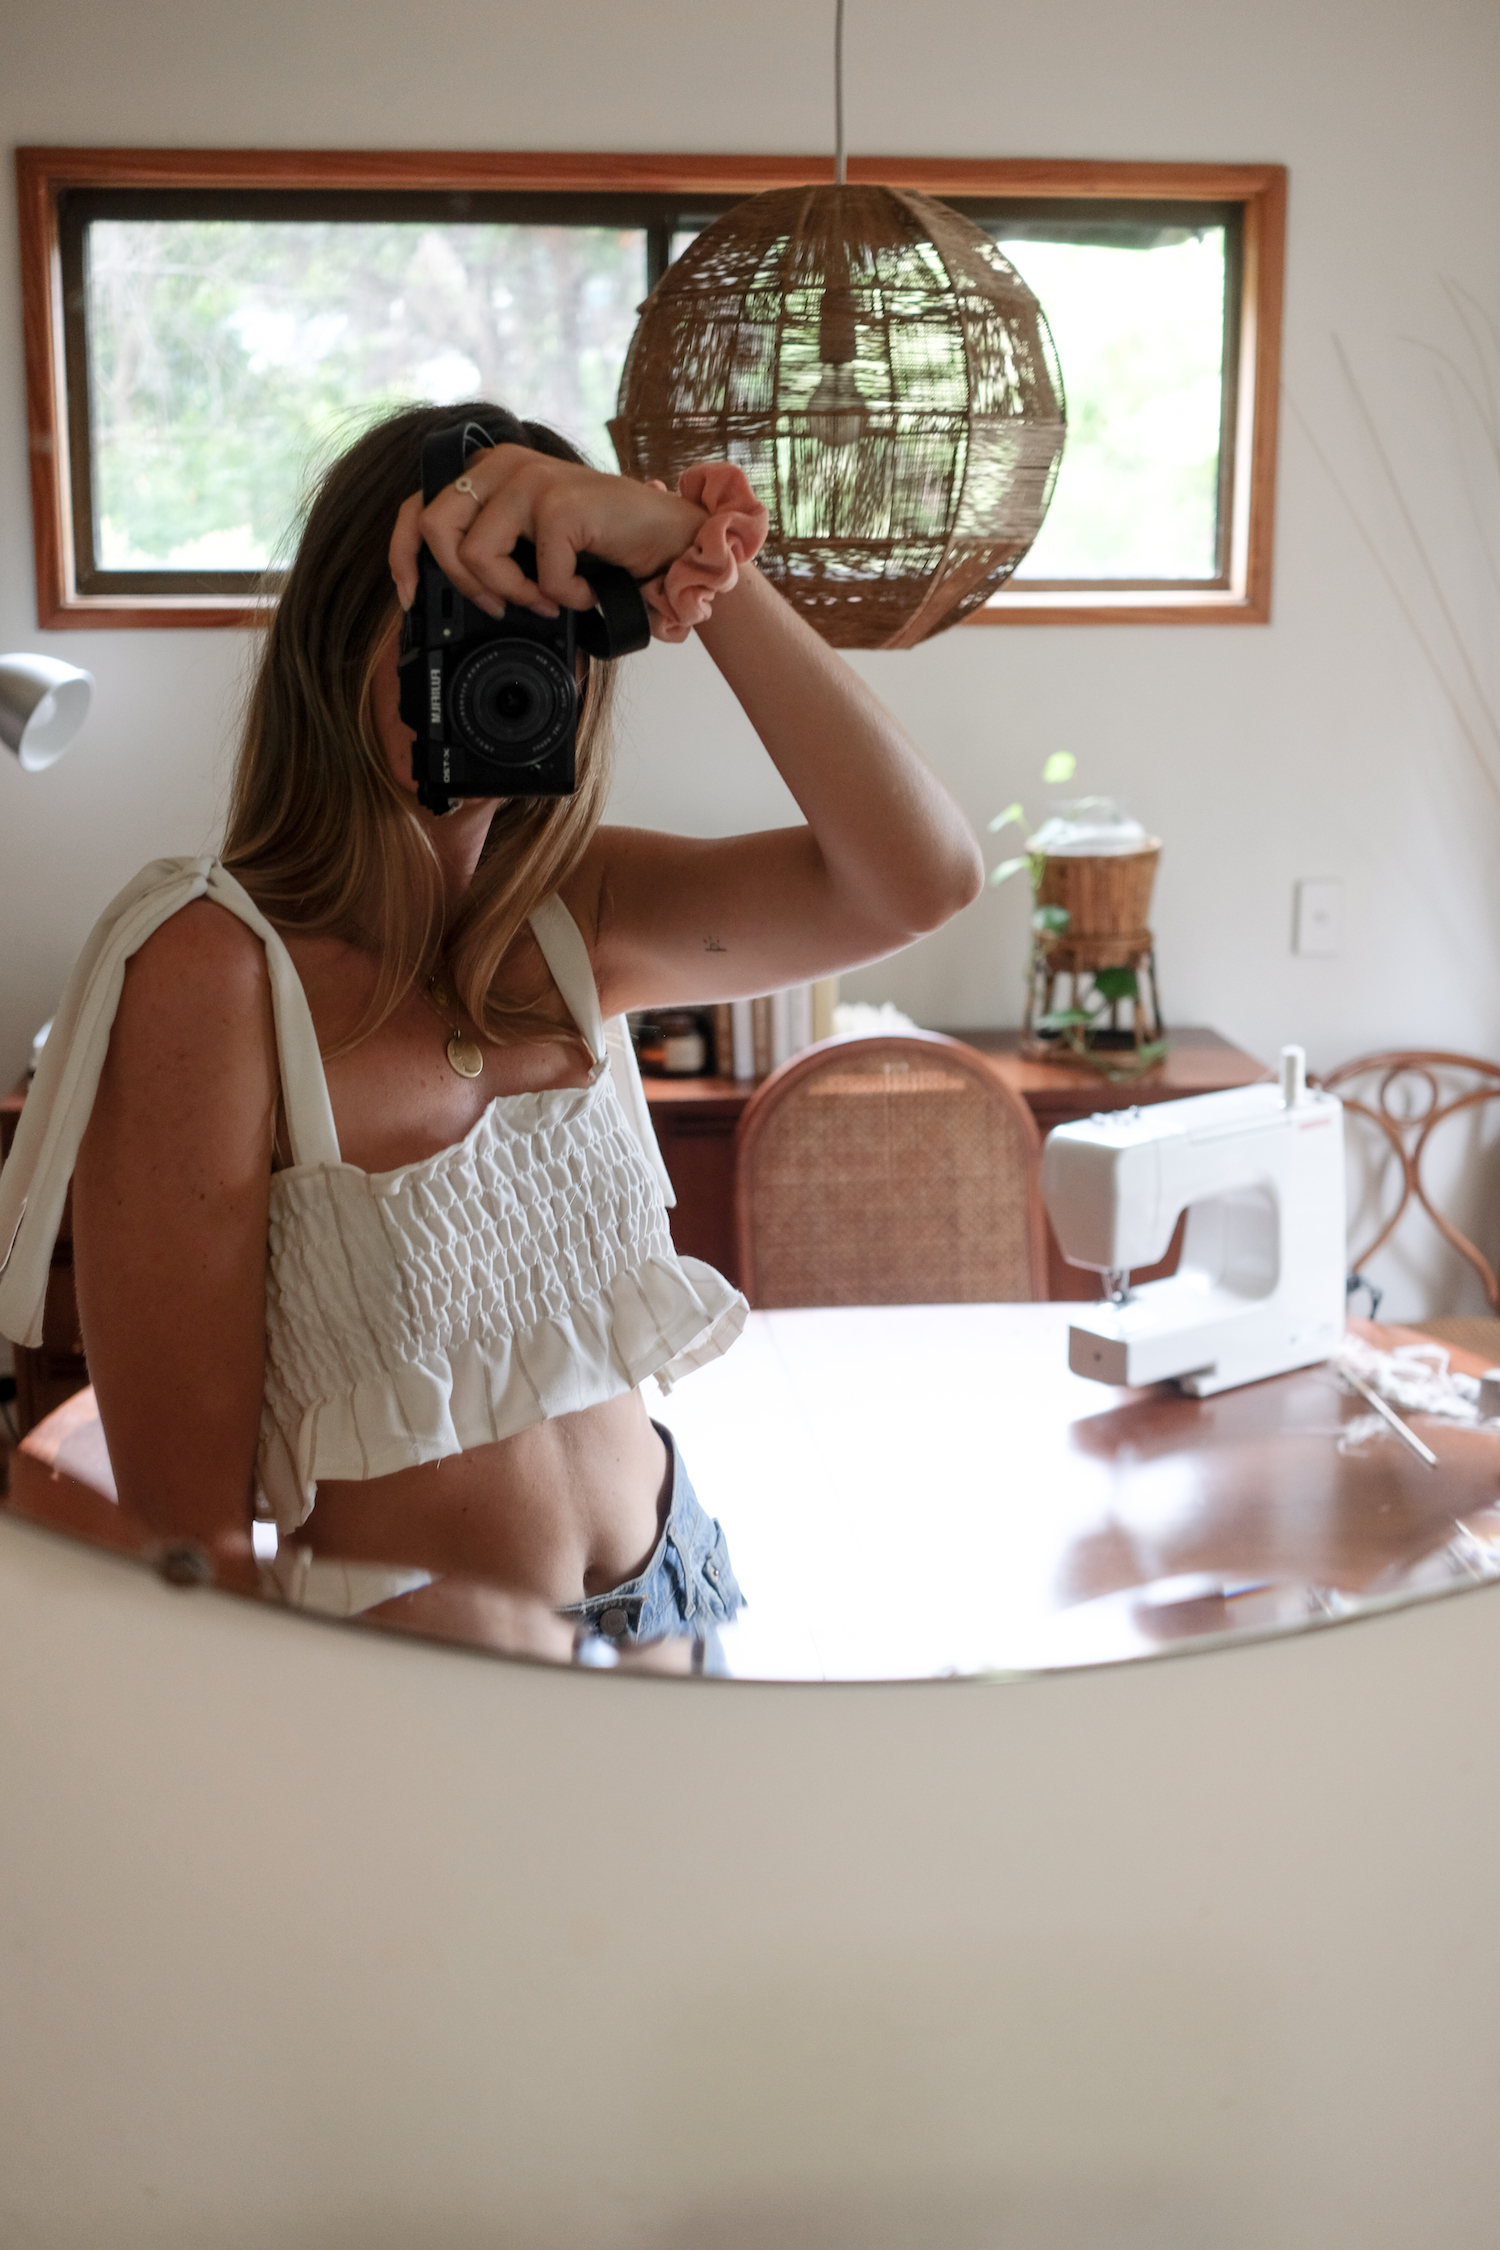
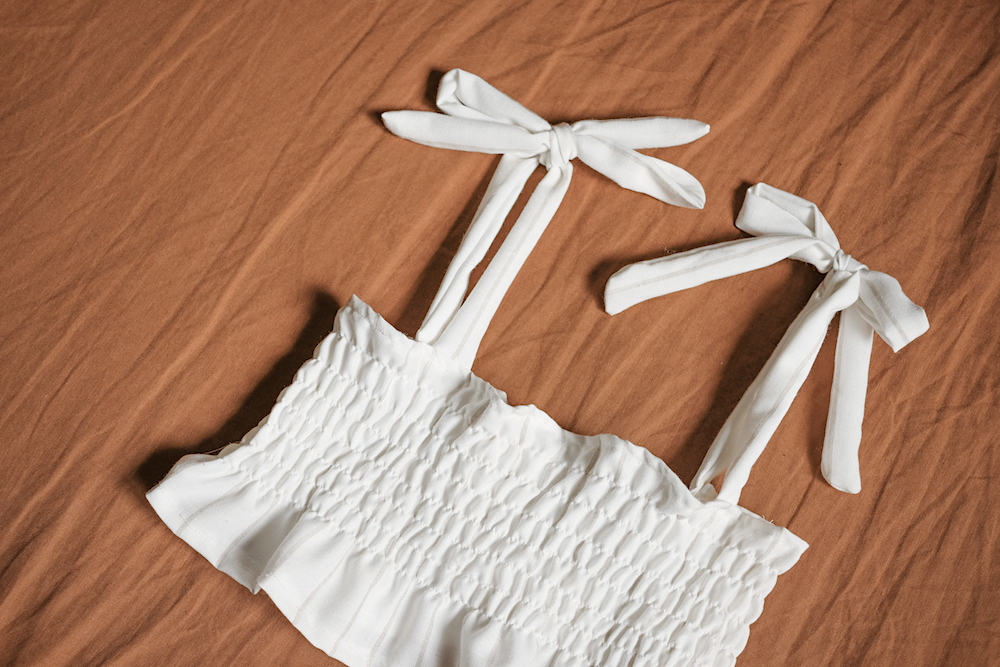
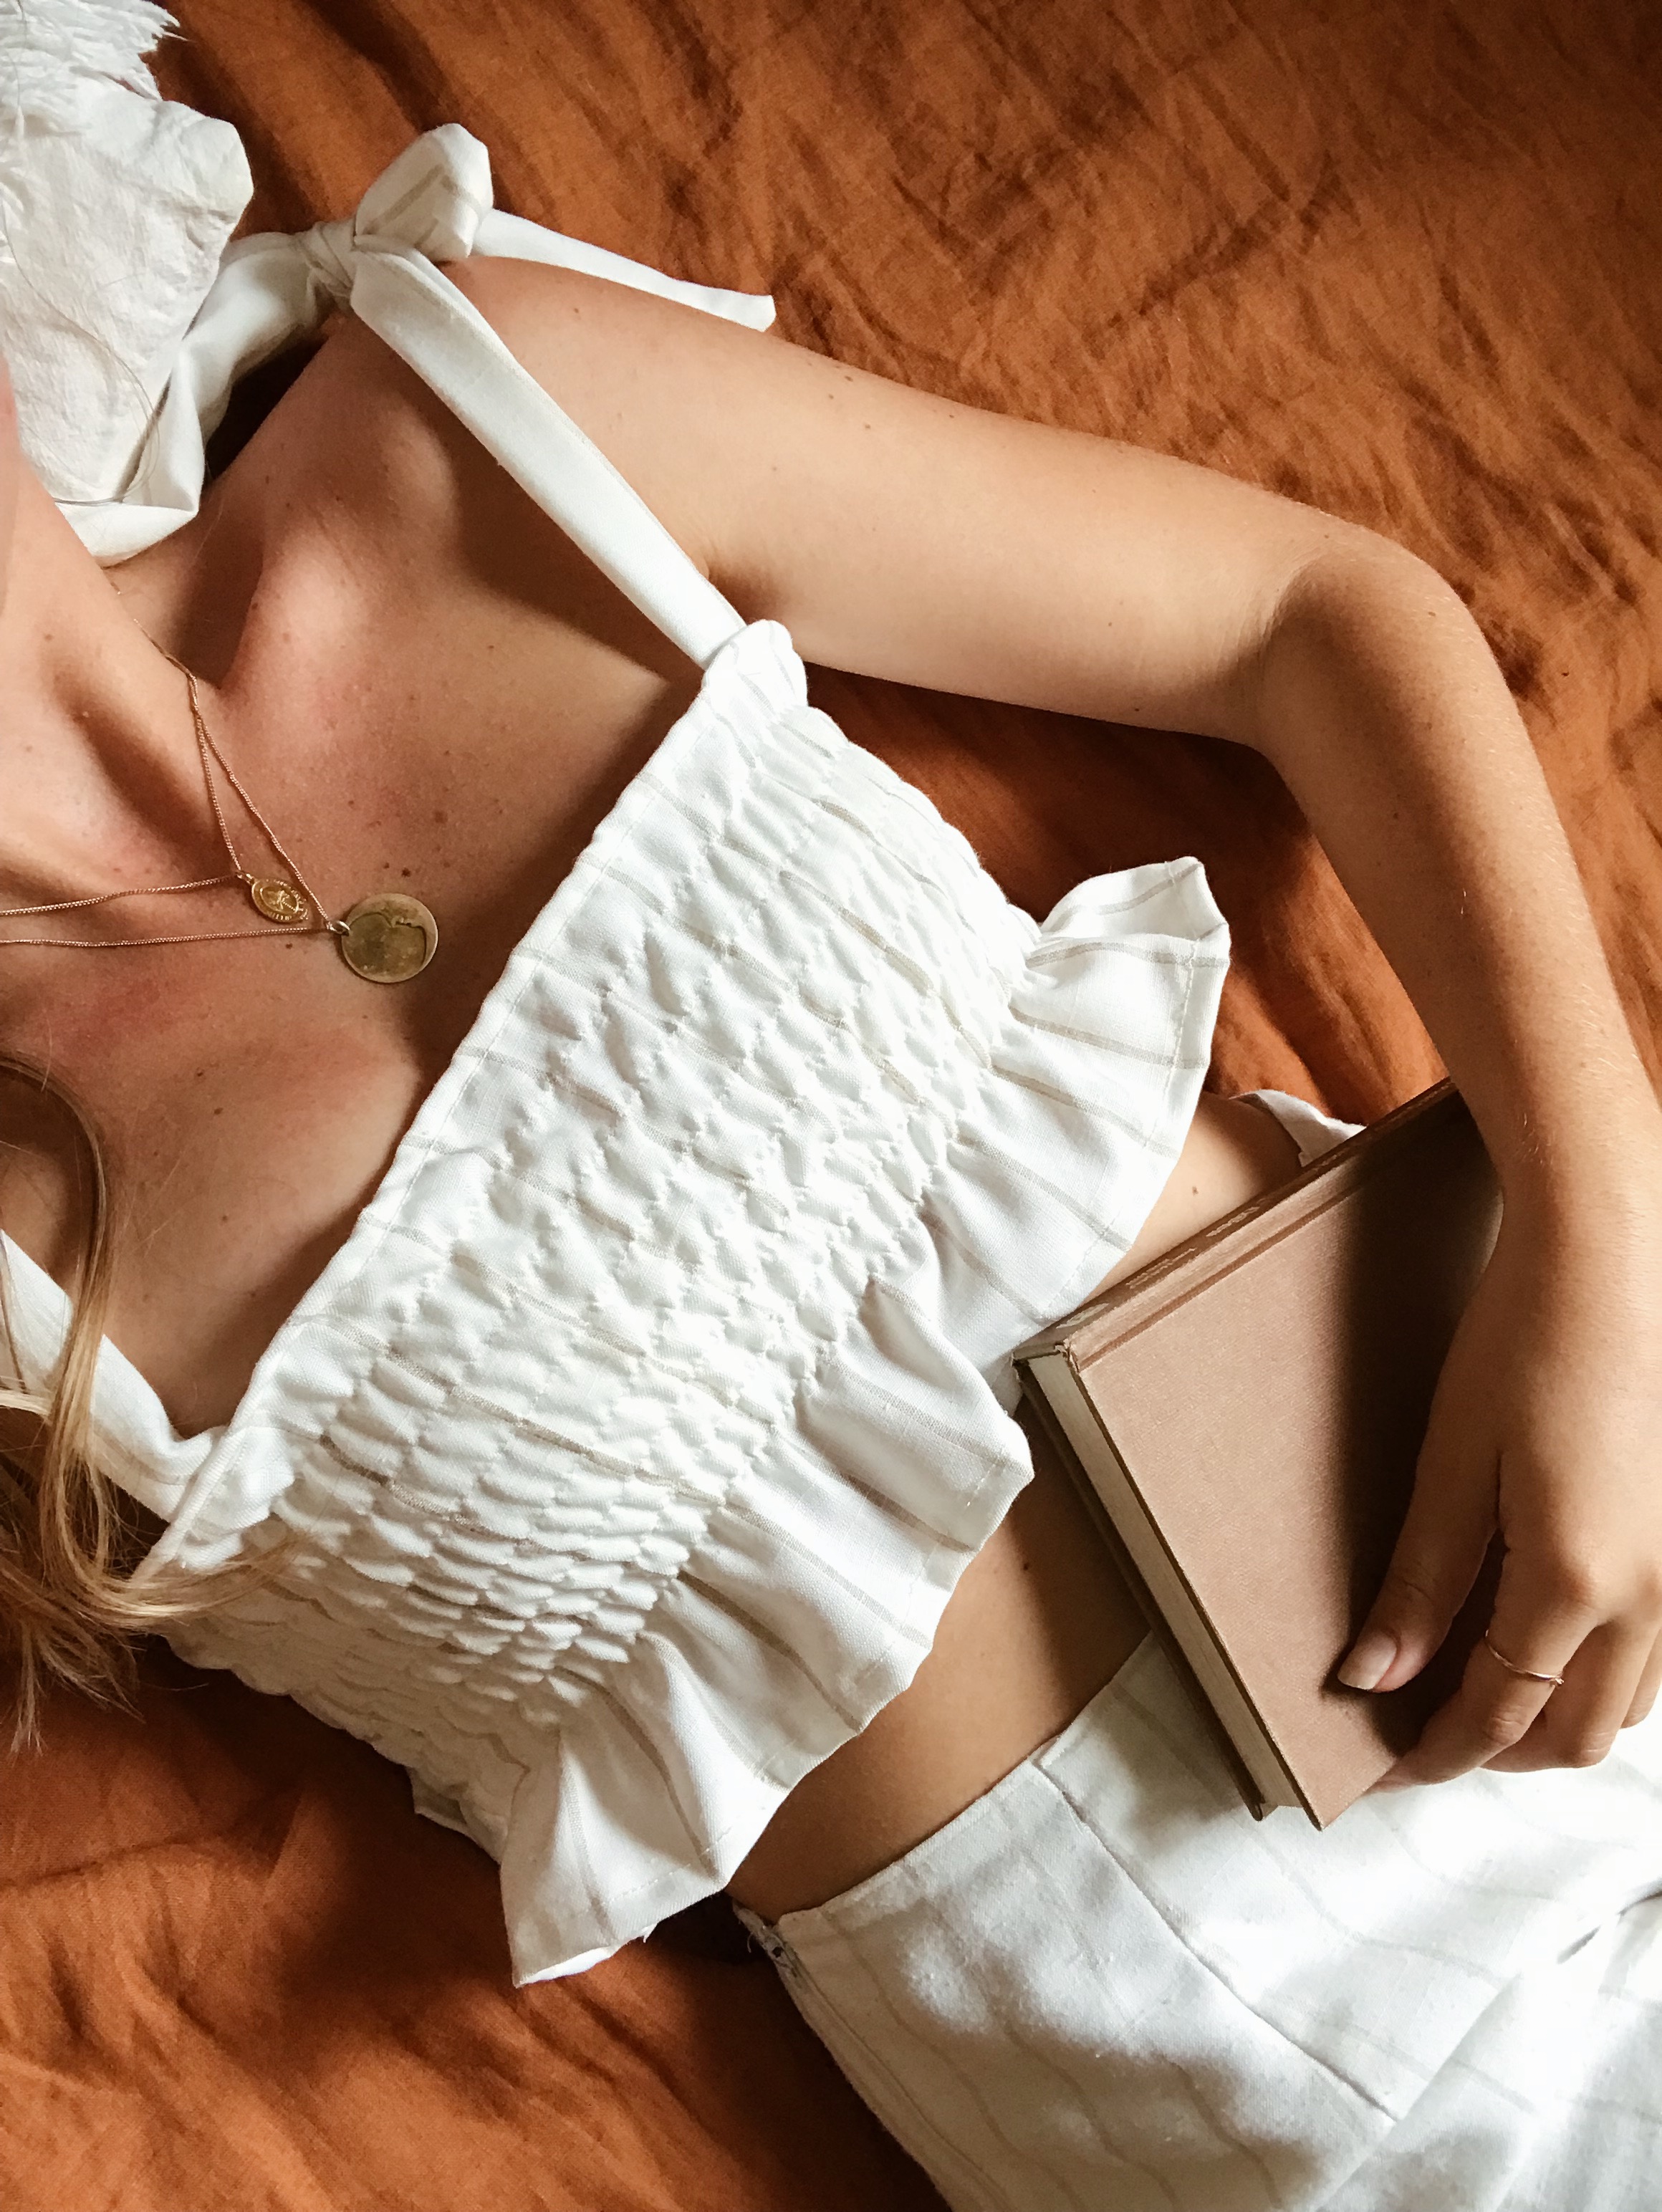
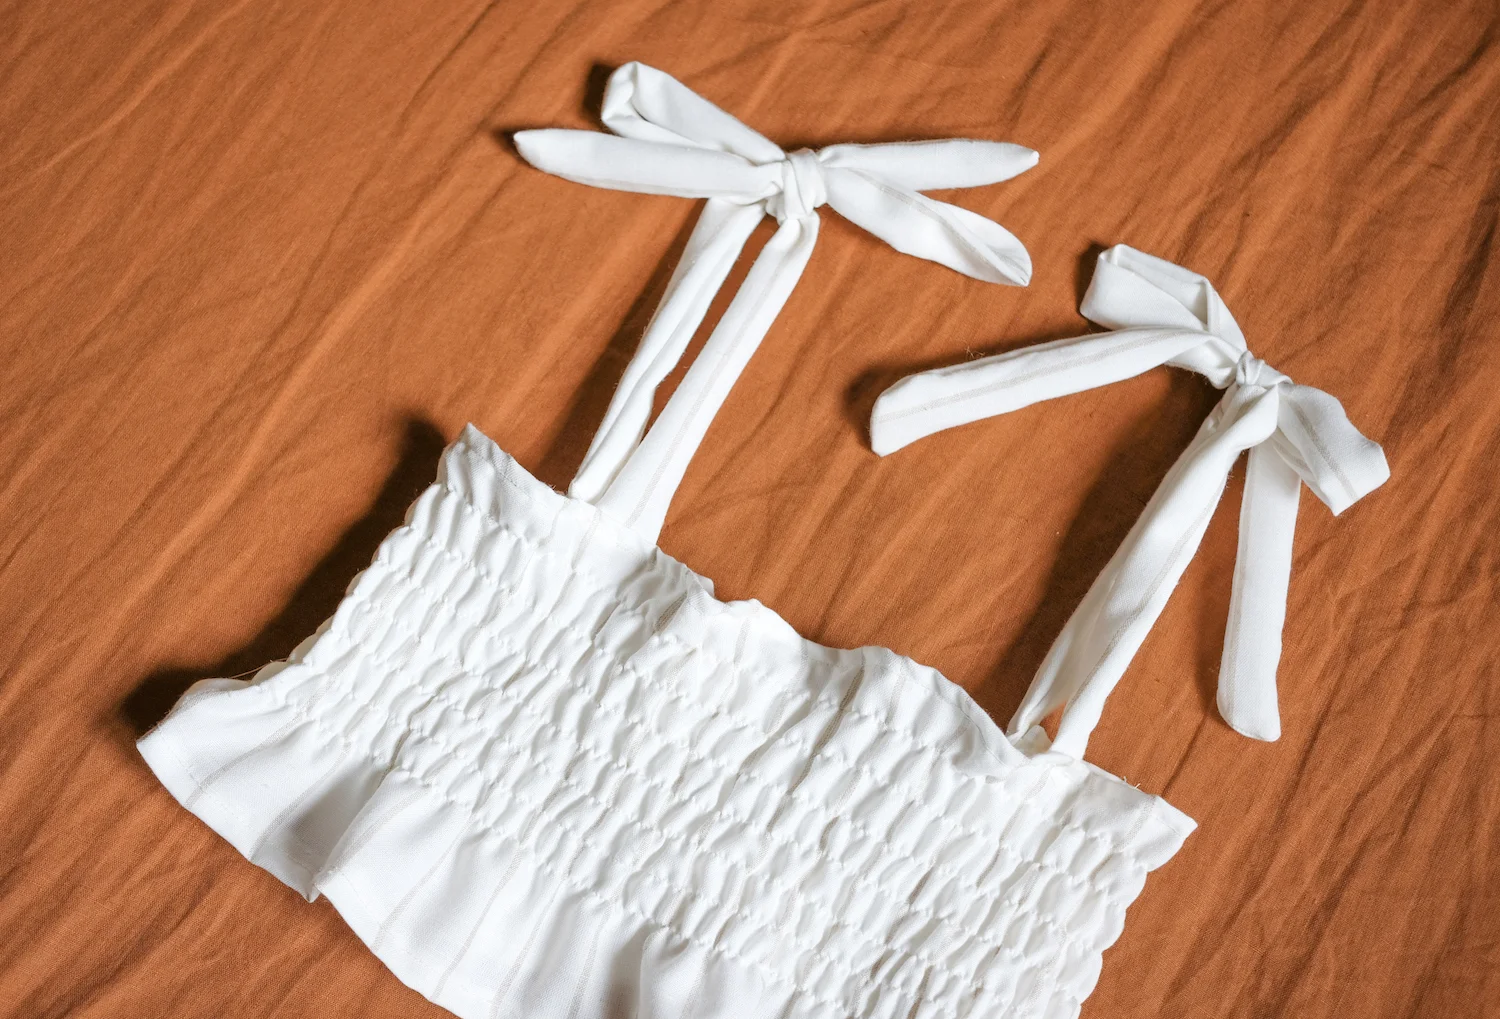
DIY: Shirred Crop Top with Tie Straps

Have some left over fabric from a previous sewing project or just want a cute crop top to add to your wardrobe? I have the ultimate, easy and adorable top for you to make along with introducing you to the wonderful world of shirring. This tutorial shares the basics of how to utilise this gathered and elasticised effect to create a simple, fitted garment.
As always, this is just a guide that can be altered to suit your style - don’t be afraid to get creative and let me know how it turns out.
Find the steps outlined below in both written and video format!
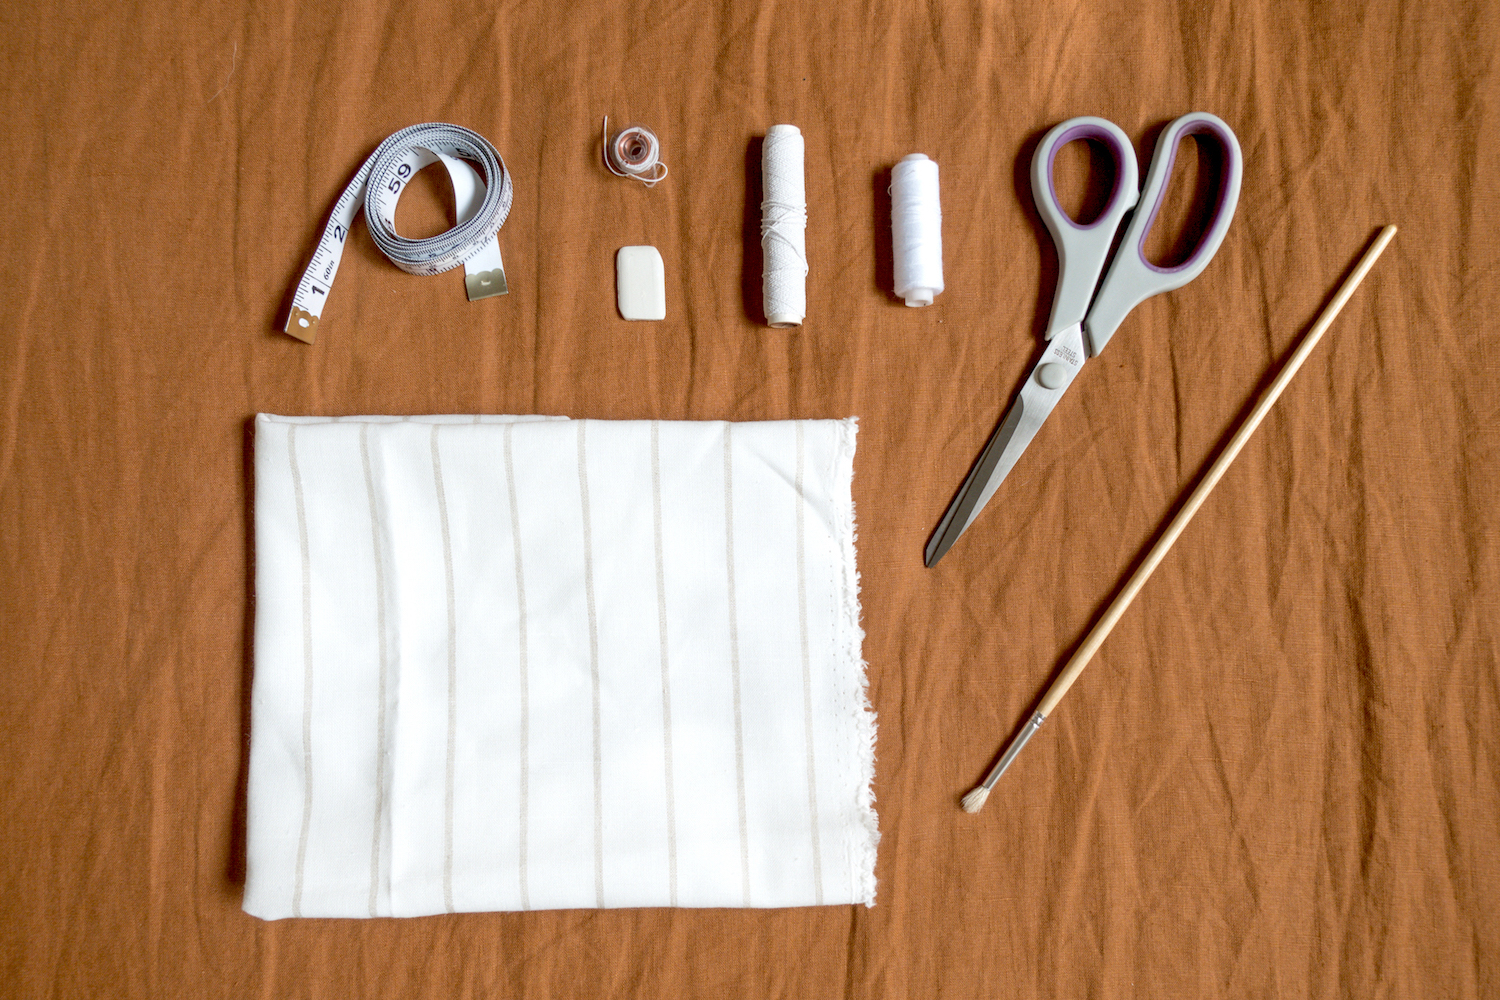
The Essentials
- Approximately 75cm-1m of fabric off the roll depending on your height.
- Matching Thread
- Shirring Thread
- Scissors
- Measuring Tape
- Fabric Chalk (or equivalent to mark sewing lines)
- Clean paint brush (or something long thin like a pencil, chopstick, etc)
- Pins
Steps.
01

Begin by finding the measurements to cut the fabric to your body.
TOP PANEL WIDTH: Measure your full bust area. Then times this by 1.5 to allow for seams and gathering effect. Then half this amount to find the width of each front and back panel.
TOP PANEL HEIGHT: To find the height of the garment measure from the middle chest to where you’d like the garment to finish (belly button might be a good point if you want that cropped effect). Then add 2 inches of seam allowance.
-
STRAPS LENGTH: Place the beginning of the measuring tape where the straps will attached to the panel and find the length from there to the top of you then add at least 12in to allow to tie into bows and for seams.
STRAPS WIDTH: Start by figuring out how wide you want the straps to be once they’re finished (maybe use an existing strappy top/dress as an indicator for what size you like). Once you’ve found the final width you’ll need to then double it and add 1in for seam allowance to find the cutting width of the strap panel.
02
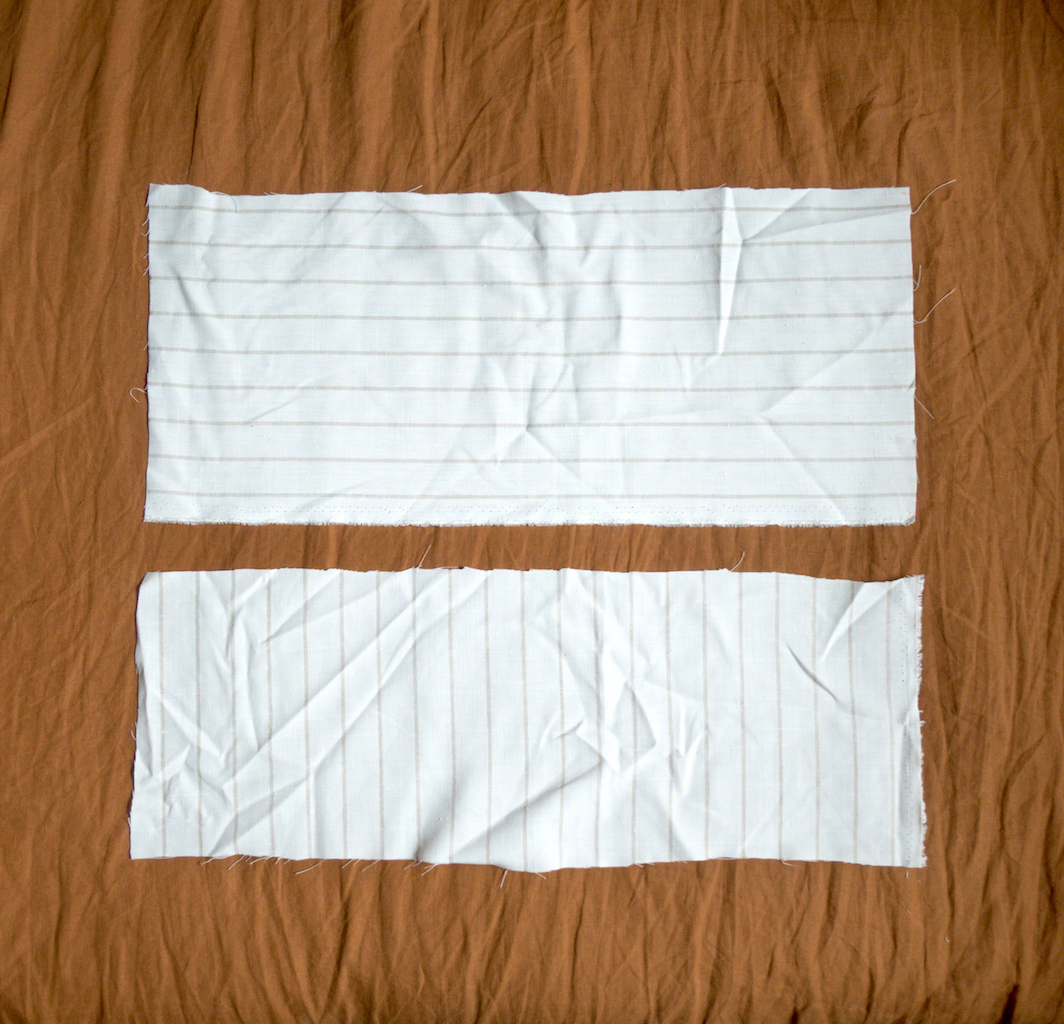
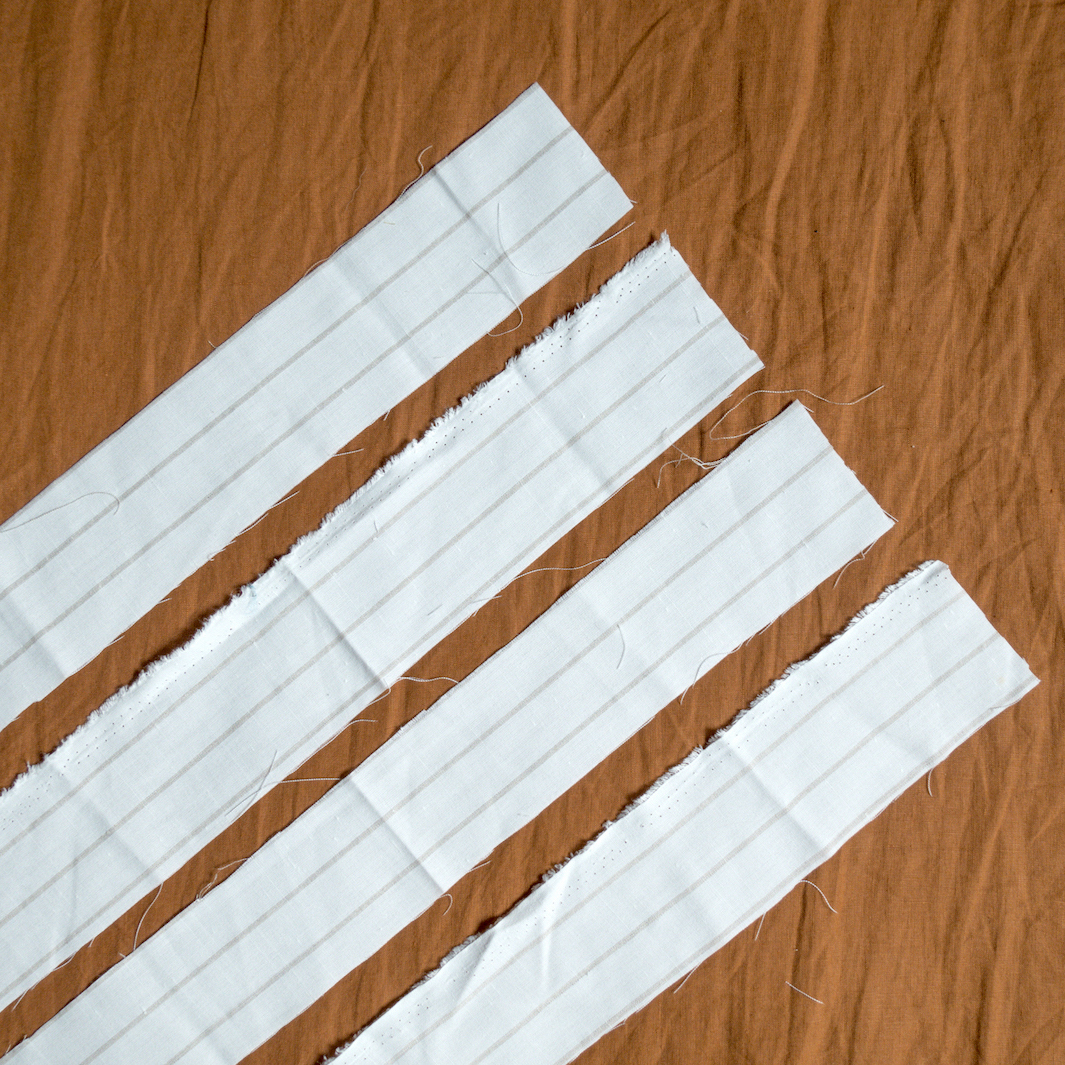
Cut out two fabric panels using the top width and top height measurements.
Then cut out four panels using the strap length and width dimensions.
You’re ready to start sewing!
03

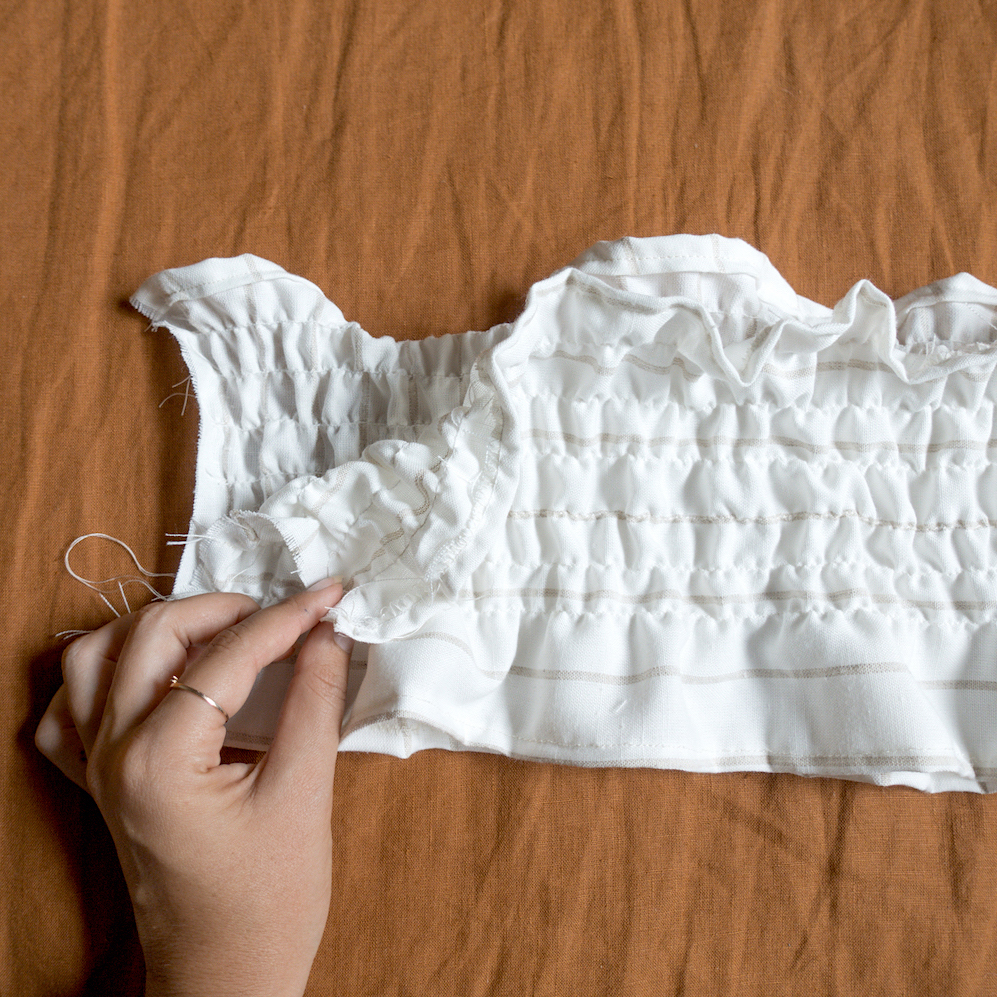
Measure the area you’d like to shirr (two thirds of a crop top is generally a good amount) and draw lines evenly apart to fill in space. The further away each line the less gathered effect otherwise the closer and more shirred lines you fit in the more bunched it will be.
Thread shirred elastic onto bobbin and setup machine. Do this by wrapping the thread by hand onto the bobbin making sure not to stretch it as you do it.
Double fold top hemline and start to sew along designated lines with good side of fabric facing up so shirred thread is hidden under. If on the first couple of sewn lines you don’t see much of a gathered effect, this is fine as it takes a good handful before you start seeing the full bunching.
04
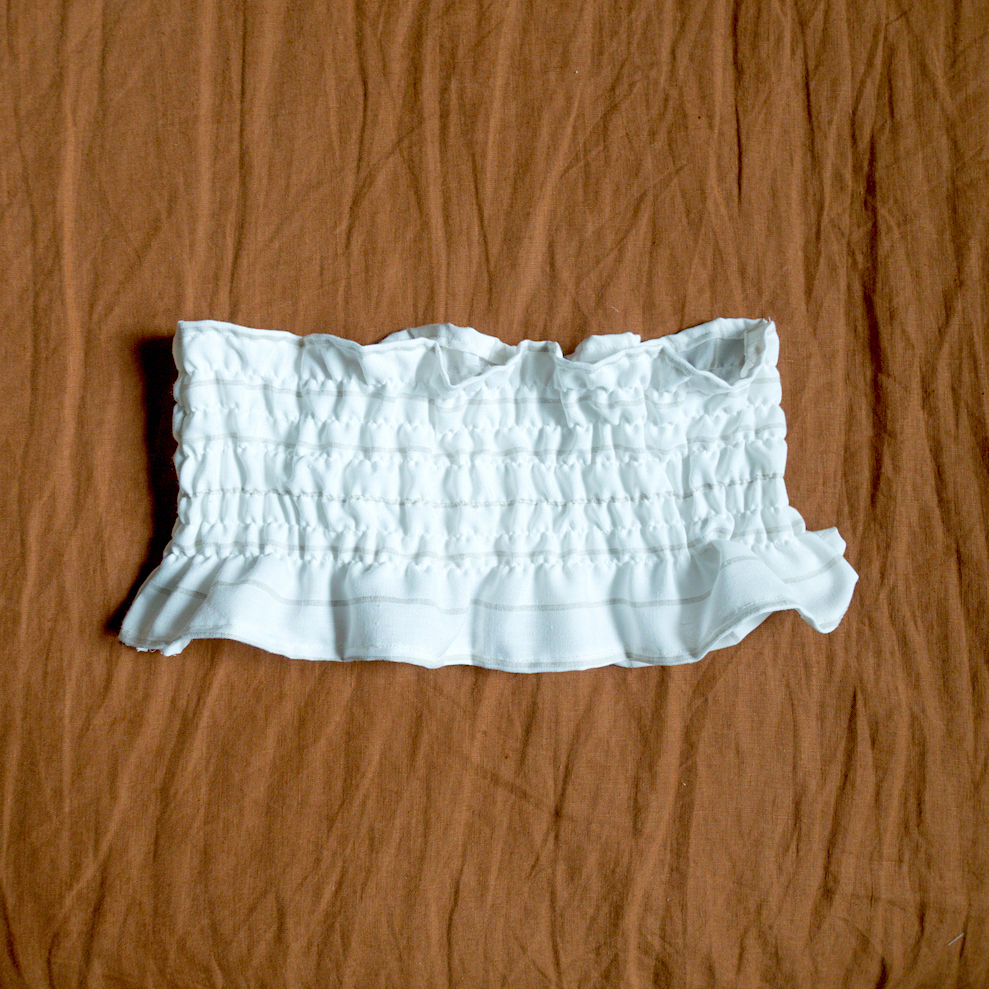
Shirring is as simple as sewing straight lines! It’s super straight forward but does chew up a bit of time depending on how many rows you need to sew.
Next it’s time to join the two panels together. To keep things nice and clean I’ve chosen to do a french seam for this.
Start off by facing the bad side together (so good sides facing out) and sew down each side. This is a good stage to try it on and make sure it sits well on your bust and making an amendments if need be.
Once you’ve got it to a desirable fit (not to loose and not too tight) cut off any excess seam fabric so that it’s close to the sewn line and then flip the good sides in so they’re facing each other. Sew down each seam, clean up bottom hems and flip the good sides back out and you have the finished top part!
Continue following steps if you’re adding straps.
05
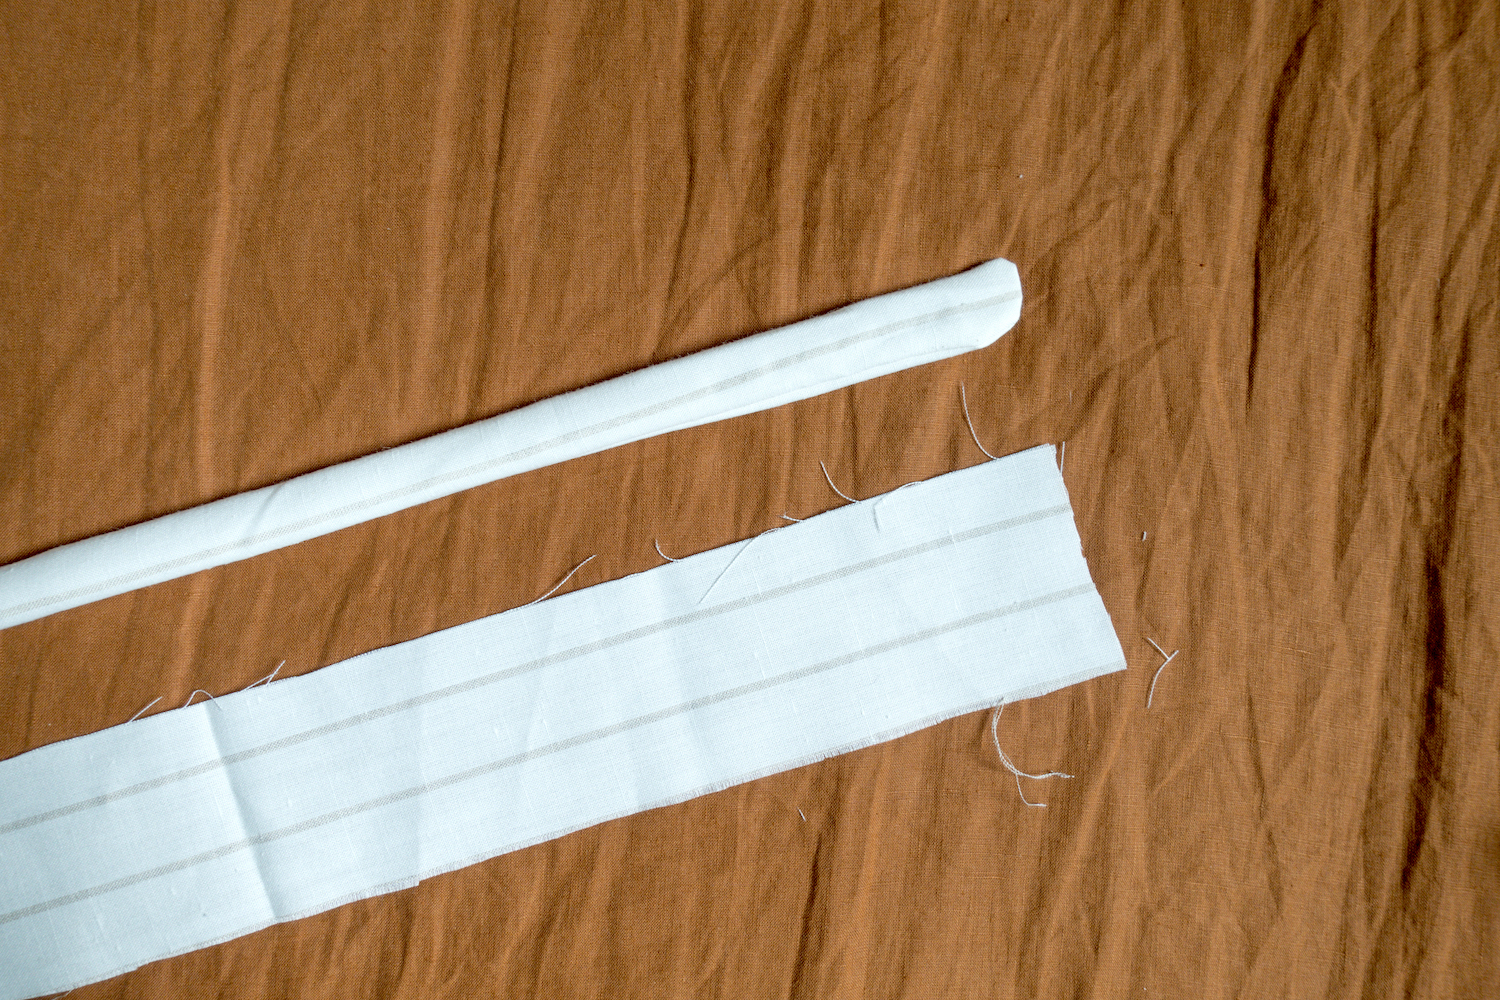
Next it’s time to prepare the straps. Fold the panels in half long ways with good sides facing each other. Sew along one short end and down the open side of the length, leaving the other short end open.
Place a pencil, pen or clean paint brush at the closed end and push the fabric through so clean sides now face out and the seam is hidden.
06
Measure where you would like the straps to sit on the top panel, pin down and sew in place.


If you wish to show your appreciation for this tutorial and support the future of this blog,
any donation is welcome through the below link :)
Hope this was helpful! As always, let me know if you give this tutorial a go and how it turns out. Hashtag the outcome #essentialsclub on social media.